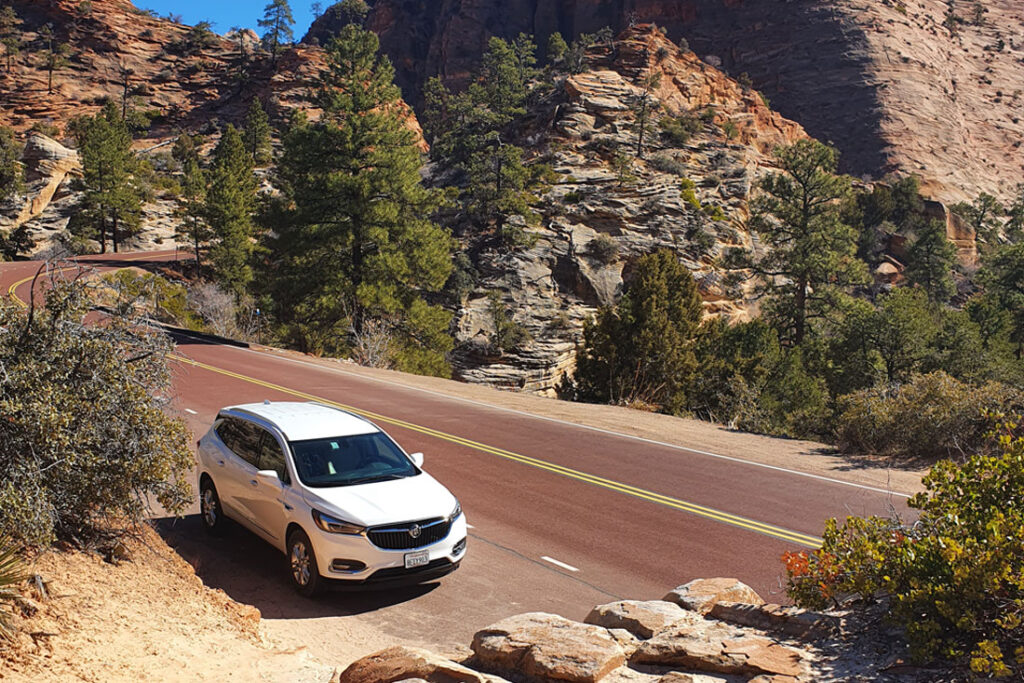
Now that you have your route planned out, and have an idea of how long it should take to do the trip, you can look into renting a car. If you’re travelling locally and already have your own vehicle, then you obviously don’t have to worry about this. But these are a few tips I’ve picked up from my trips.
Shop Around & Compare Prices from Different Office Locations: The type of car you get is obviously up to you, but it’s always worth shopping around and comparing different prices/locations.
On a two week road trip I did in Canada, I ended up renting a car that was a 30 minute train ride from downtown Vancouver, for a few hundred dollars. If I got that exact same car from the same rental company but from their airport office, it was going to be $1000 more than what I paid. Purely because the location was more popular and convenient for most people. So even if you use a certain company regularly for your bookings – check if they have multiple rental locations around your starting point.
Scams & Insurance: Always go with reputable car rental companies where you can. Ideally ones that are well known globally – or if you’re unsure, make sure to do your research and check reviews. While most companies would likely be fine to rent from, there are often reports of some smaller or dodgy looking ones saying you’ve scratched the car and then try and charge ridiculous fees.
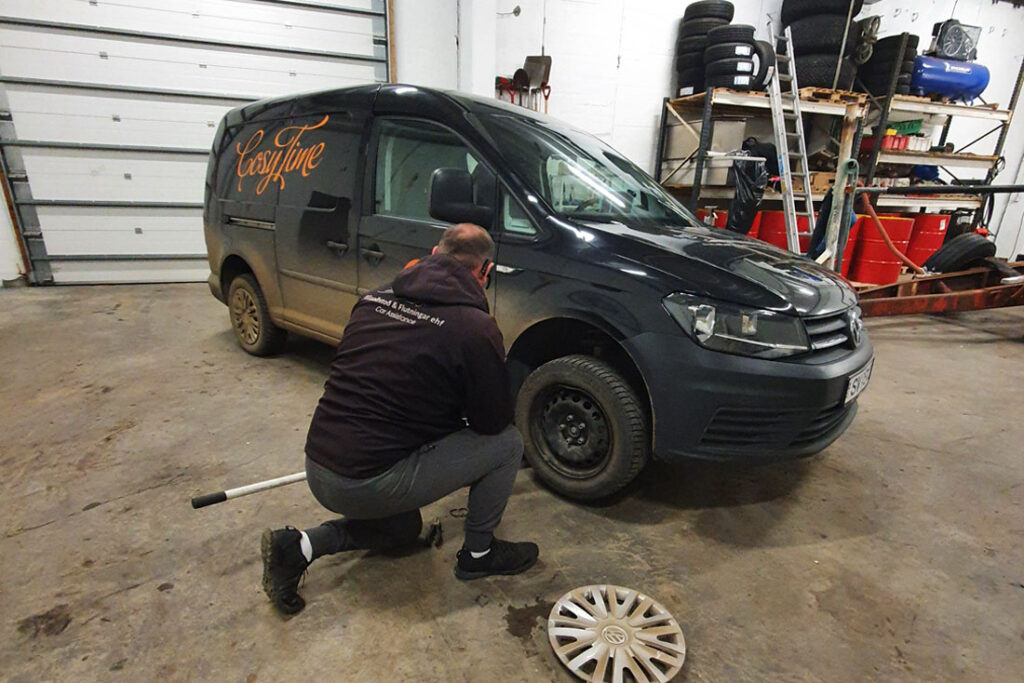
Take photos/video of the vehicle and any marks when you pick it up (and also if returning it off out of hours). Just to make sure you have evidence in case they try and charge you for something you didn’t do.
And also check what you’re covered for in case of an accident/breakdown to make sure there are no unexpected costs. Although I’ve never had to use it – I get Car Hire Excess Insurance from Worldwide Insure for about £60 a year. Which saves a lot from upgrading the insurance cover with the car rental company.
Unfortunately they don’t cover Iceland, and I decided not to upgrade to the higher insurance coverage on my trip there, and ended up paying £300 for a new tyre (after a bad puncture), and almost £900 to repair wind damage to the door. That increased the cost of my trip by about 50%! I won’t be making that mistake again.
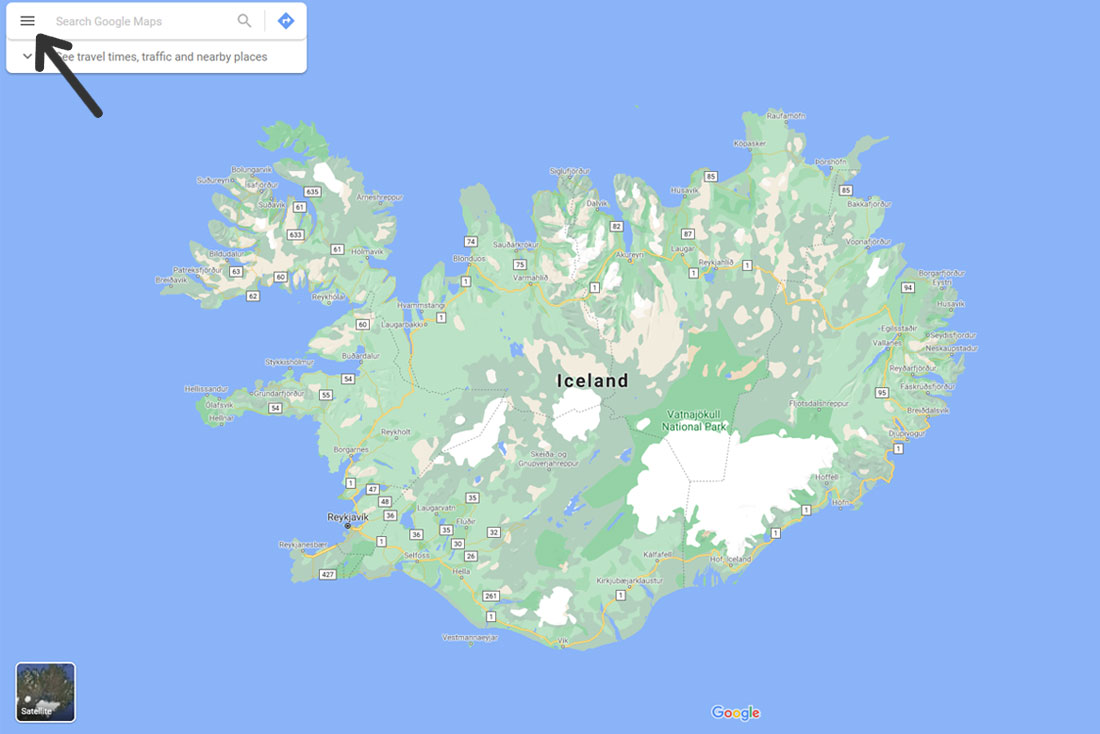
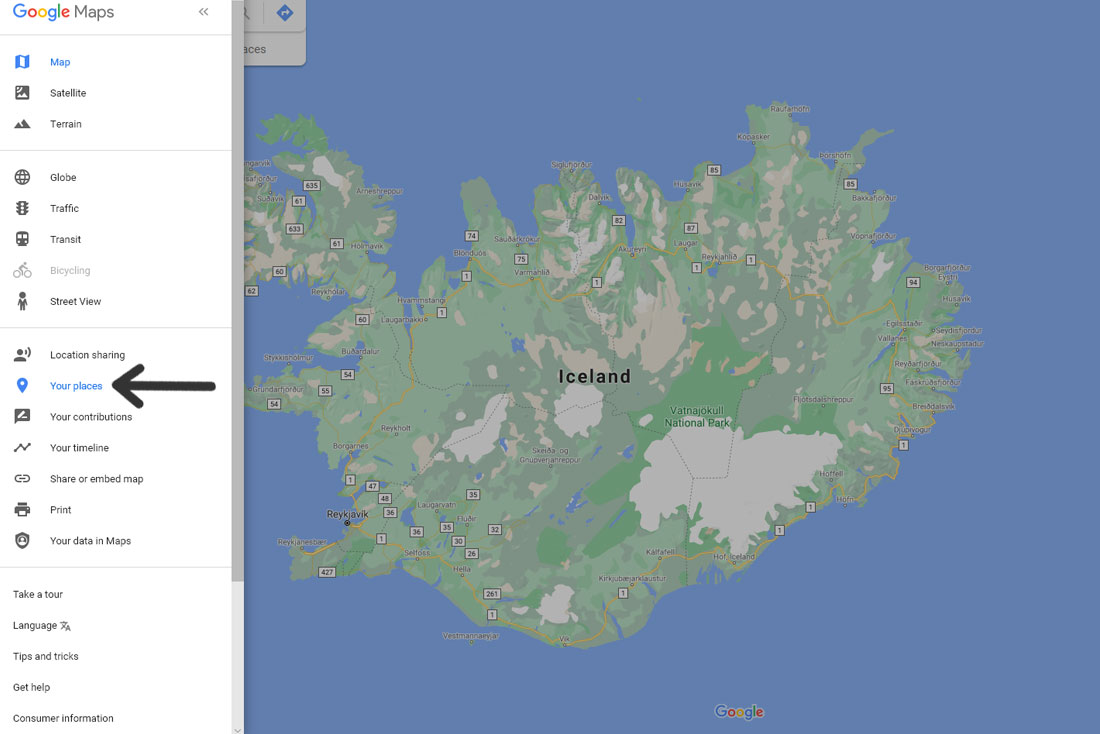
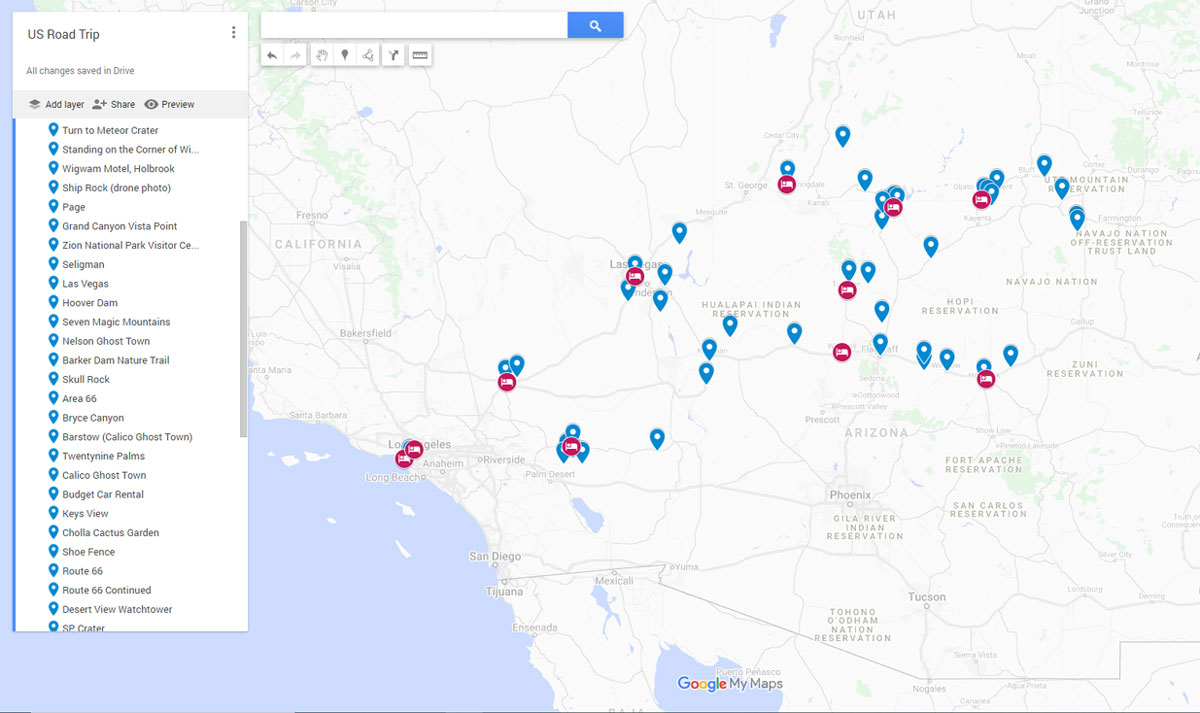
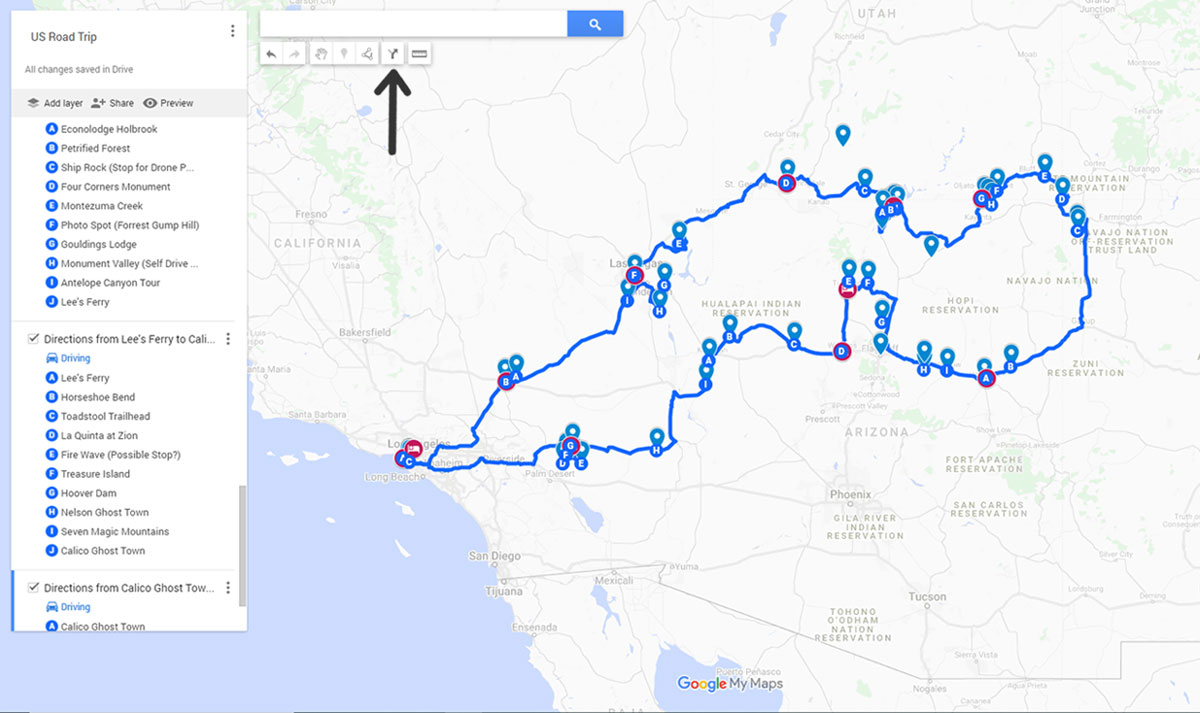
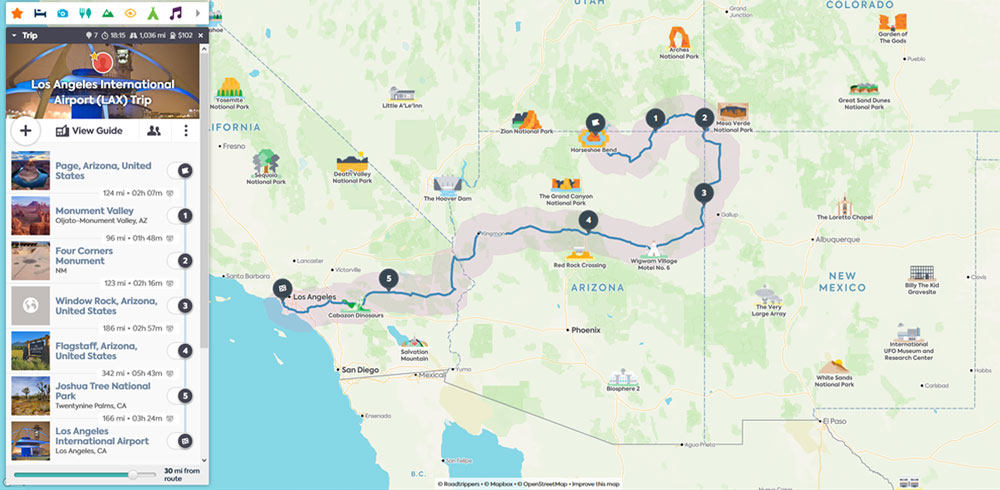
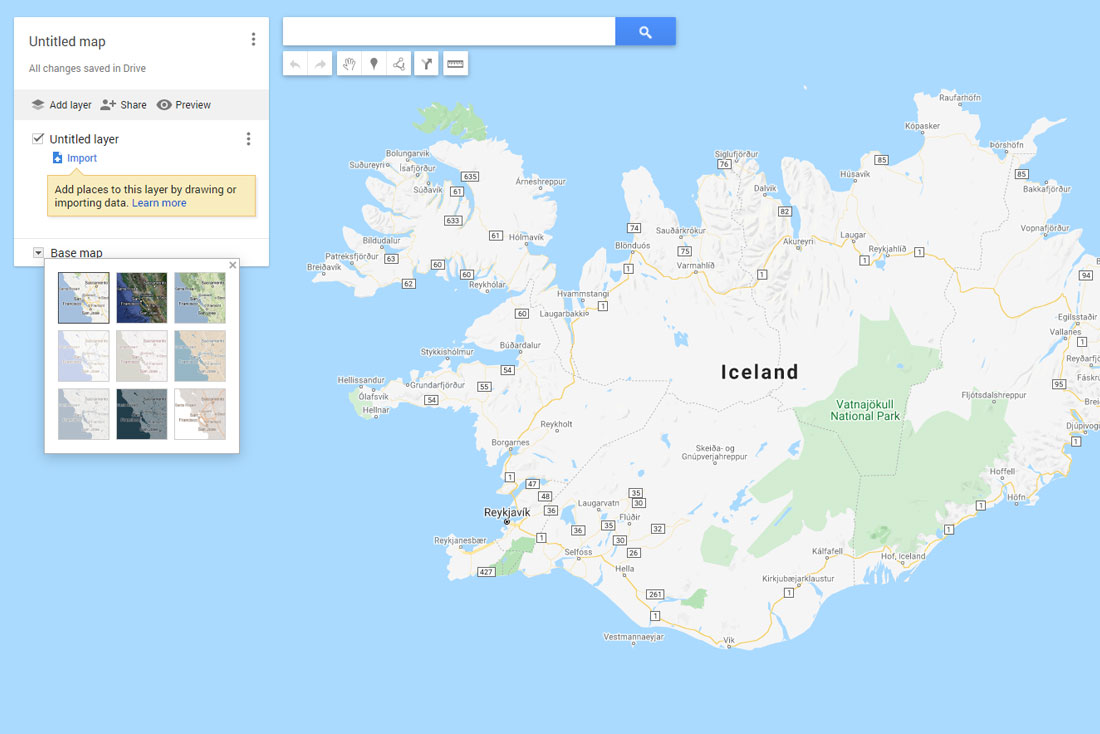 In the new page that opens, you can add a title to your map, choose your base map style, create new layers (for separating categories), and can start adding places to your map
 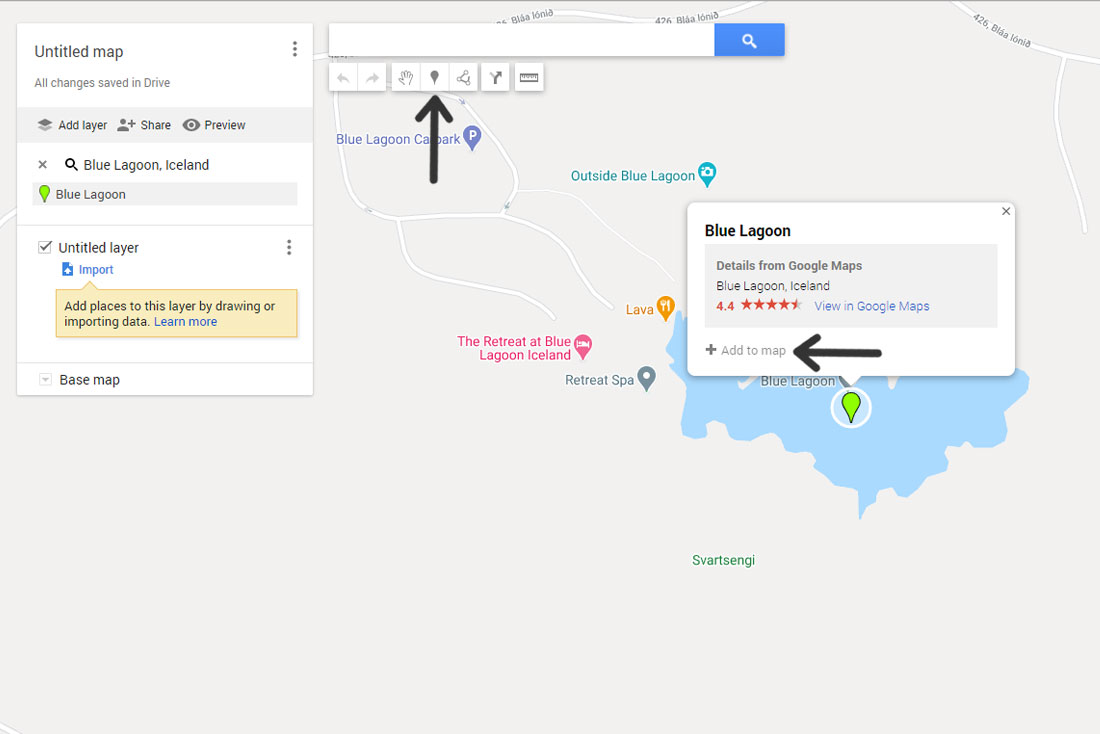 You can add markers either by clicking the 'Add Marker' icon under the search bar and clicking on the map. Or you can search for the location (or click on any existing location marker), and click '+ Add to Map' at the bottom of the location pop up.